How to Install Sponge Tube Padding on Indoor Playground Metal Frames
Introduction
Proper installation of sponge tube padding is essential for both safety and longevity. Incorrectly installed tubes can slip, create gaps, or wear prematurely.
Tools and Materials You'll Need
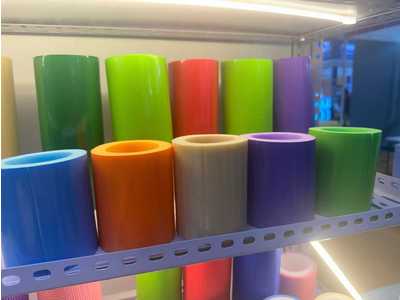
- Sponge tubes — measured and cut to length
- Cable ties — UV-stabilized nylon, 200mm or longer
- Scissors or utility knife
- Measuring tape
- Cleaning cloth
- Optional: Contact adhesive and end caps
Pre-Installation Preparation
1. Clean the Metal Frames
Remove any dirt, grease, rust, or old adhesive. A clean surface ensures better grip and prevents abrasion.
2. Inspect the Frames
Check for sharp edges or burrs (file smooth), welding spatter (grind down), and rust (treat before covering).
3. Measure and Plan
Record the outer diameter of each pipe, measure the length of each straight section, note any bends or joints, and plan how tubes will meet at corners.
Step-by-Step Installation
Step 1: Cut Tubes to Length
Add 5–10mm extra length for compression at ends. Use sharp scissors for clean cuts — cut square for clean joints.
Step 2: Open the Slit
Gently open the longitudinal slit along the full length. Be careful not to tear the material. If hard to open, warm the tube slightly with your hands.
Step 3: Wrap Around the Frame
Position the tube over the frame, press the slit closed around the frame, and ensure even seating without twisting.
Step 4: Secure with Cable Ties
Place ties every 30–50cm on the underside. Tighten firmly but not so tight they deform the tube. Trim excess tails with flush cutters. Place a tie within 2cm of each end to prevent sliding.
Step 5: Handle Corners and Joints
90° Corners: Miter cut at 45° angles and fit together. T-Junctions: Butt joints with extra piece to cover exposed metal.
Installation Best Practices
| Application | Tie Spacing |
|---|---|
| Vertical pillars | 40–50cm |
| Horizontal rails | 30–40cm |
| Handrails | 25–30cm |
| Climbing bars | 20–25cm |
Post-Installation Checklist
- Visually inspect all installations
- Test tube security by gently pulling
- Check for exposed sharp edges
- Verify tie tails are trimmed
- Photograph for records
Conclusion
Proper installation ensures maximum safety protection and product longevity. Take time to measure accurately and secure tubes properly.
Need installation support? Contact our team for guidance.